Deploying Website with Azure Load Balancer
Step 1: Create a Resource Group
- Sign in to the Azure Portal https://portal.azure.com.
- Click on the "Create a resource" button (green plus sign) in the upper-left corner.
- Search for "Resource group" and select it.
- Click the "Create" button.
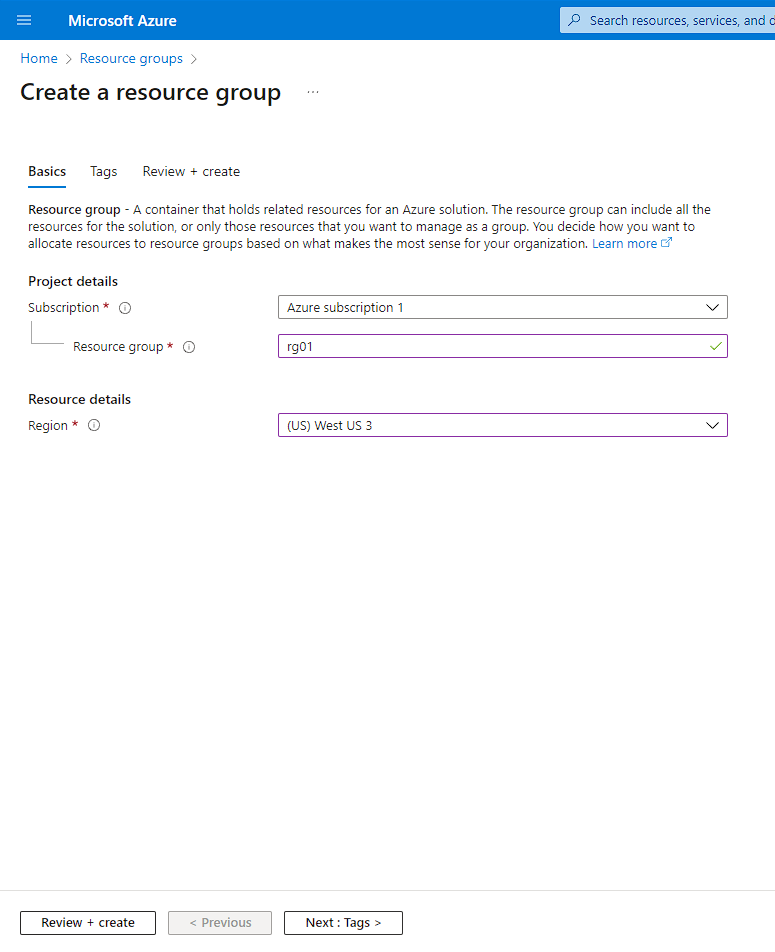
- Fill in the details for the resource group:
- Subscription: Choose your Azure subscription.
- Resource group: Enter a unique name for your resource group.
- Region: Select a region for your resource group.
- Click the "Review + create" button and then "Create" to create the resource group.
Resource Group
Step 2: Create a Network Security Group (NSG) with Inbound Rules
- In the Azure Portal, search for "Network security group" and select it.
- Click the "Create" button.
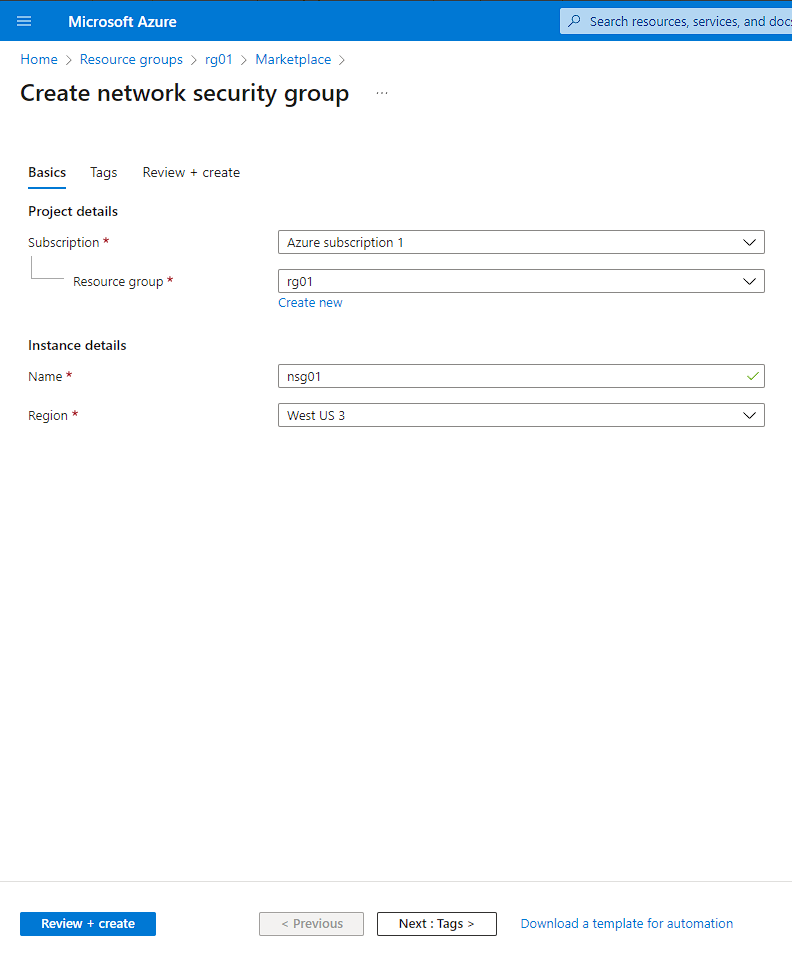
- Fill in the details for the NSG:
- Name: Enter a unique name for your NSG.
- Resource group: Choose the resource group created in Step 1.
- Region: Select the same region as your resource group.
-
Click the "Review + create" button and then "Create" to create the NSG.
-
After creating the NSG, select it and navigate to the "Inbound security rules" section.
-
Add the following inbound rules:
-
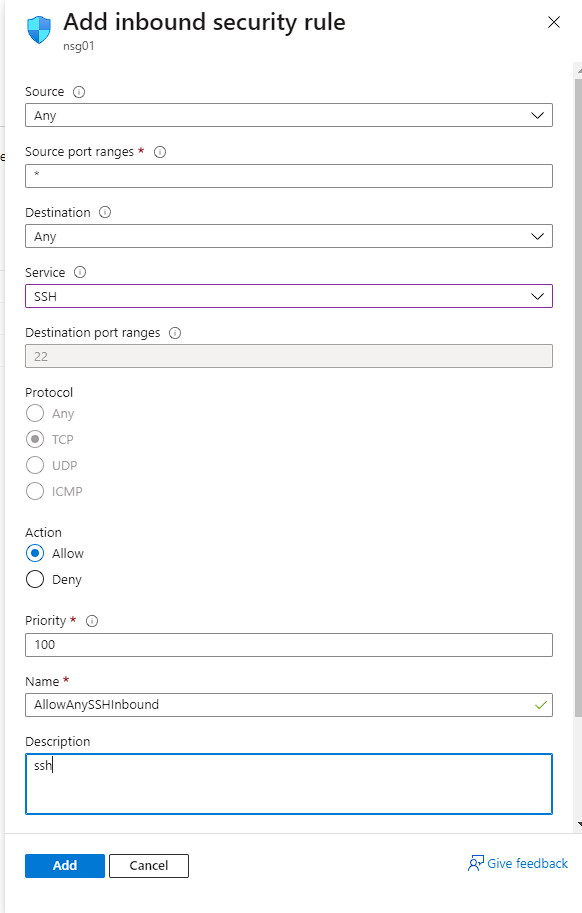
Rule 1: SSH (Port 22 Inbound)
- Name: SSH
- Priority: Choose a priority value (e.g., 100)
- Source: Any
- Service: SSH
- Action: Allow
-
Rule 2: HTTP (Port 80 Inbound)
- Name: HTTP
- Priority: Choose a priority value (e.g., 200)
- Source: Any
- Service: HTTP
- Action: Allow
-
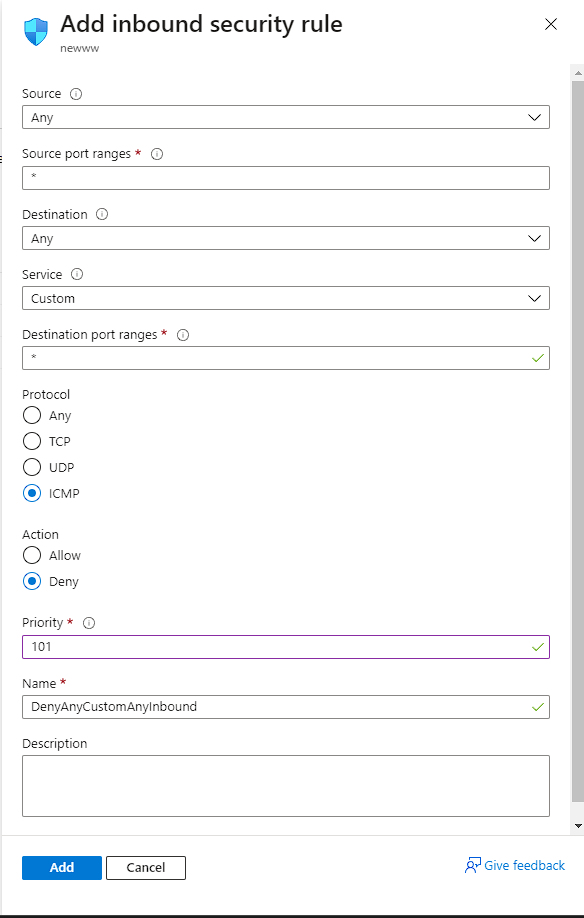
Rule 3: ICMP Deny (Block All ICMP Inbound)
- Name: ICMP Deny
- Priority: Set the priority to 101
- Source: Any
- Service: ICMP
- Action: Deny
-
Save the changes to the NSG.
Network Security Group

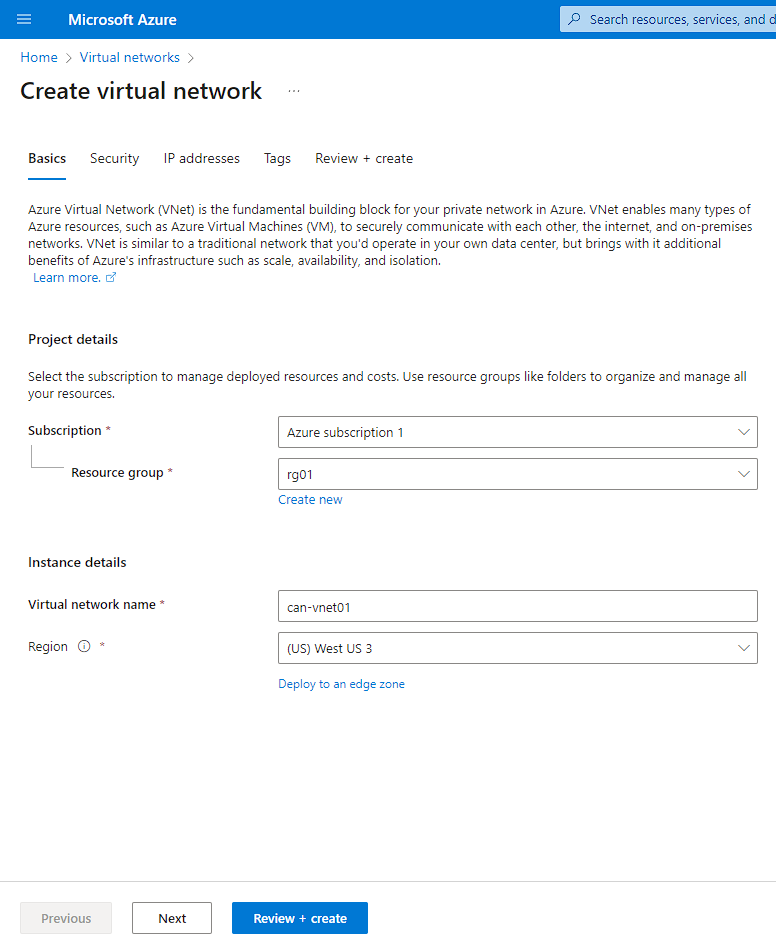
Step 3: Create a Virtual Network (VNet)
- In the Azure Portal, search for "Virtual network" and select it.
- Click the "Create" button.
- Fill in the details for the VNet:
- Name: Enter a unique name for your VNet.
- Resource group: Choose the resource group created in Step 1.
- Region: Select the same region as your resource group.
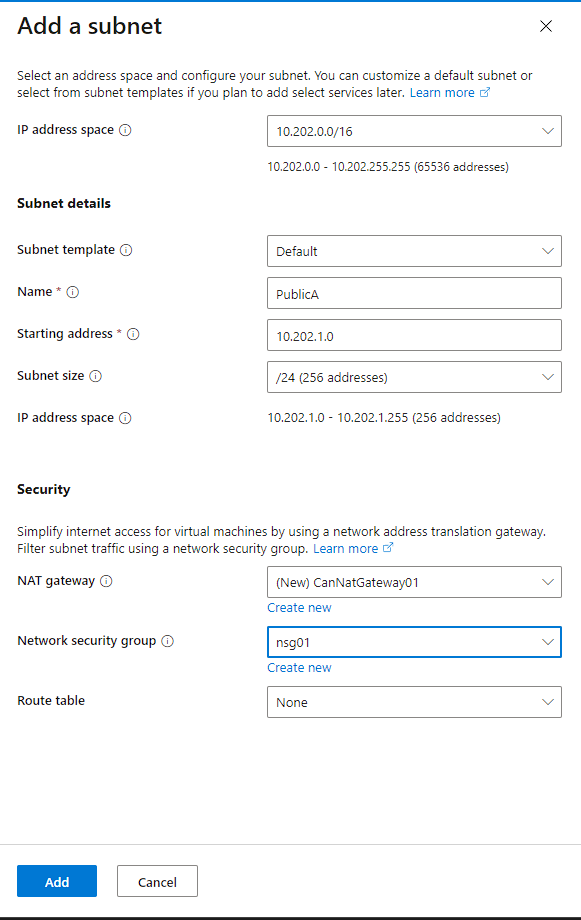
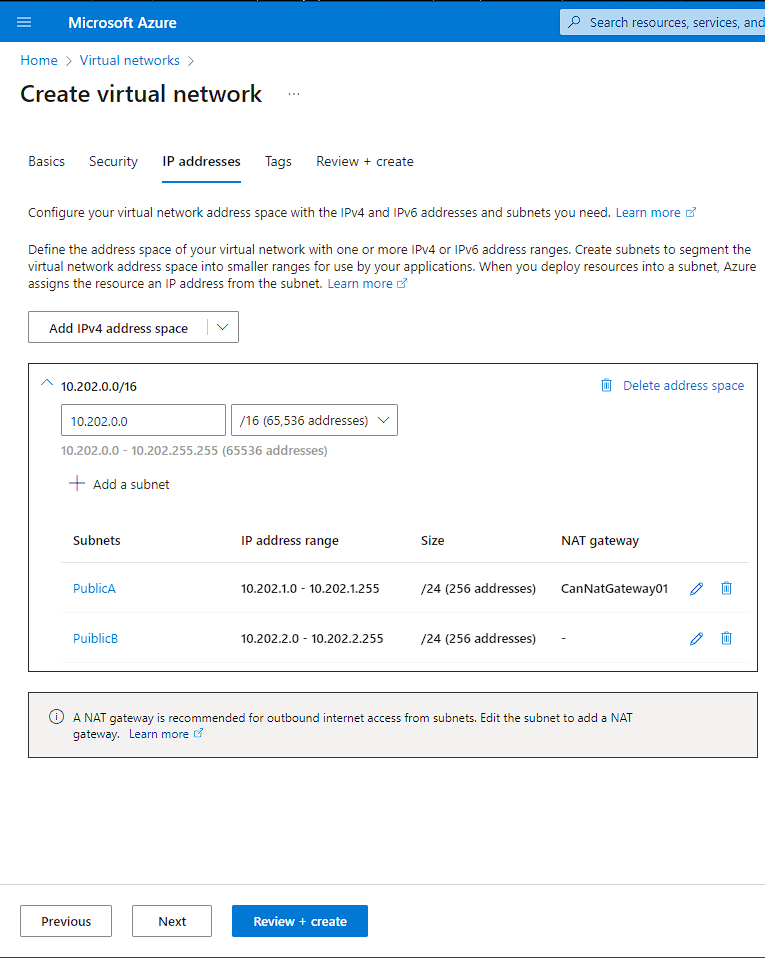
- Configure the address space and subnets for your VNet.
- Click the "Review + create" button and then "Create" to create the VNet.
Virutal Network

Step 4: Create a Load Balancer
- In the Azure Portal, search for "Load balancer" and select it.
- Click the "Create" button.
- Fill in the details for the load balancer:
- Name: Enter a unique name for your load balancer.
- Resource group: Choose the resource group created in Step 1.
- Region: Select the same region as your resource group.
- Choose the "Internet-facing" or "Internal" load balancer, depending on your requirements.
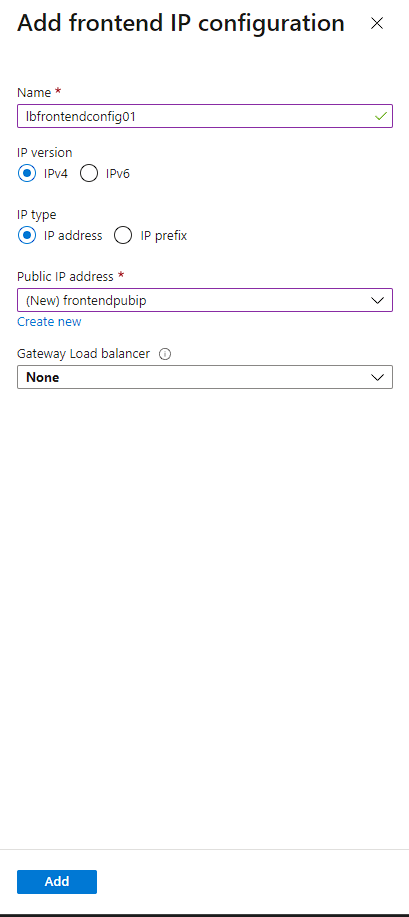
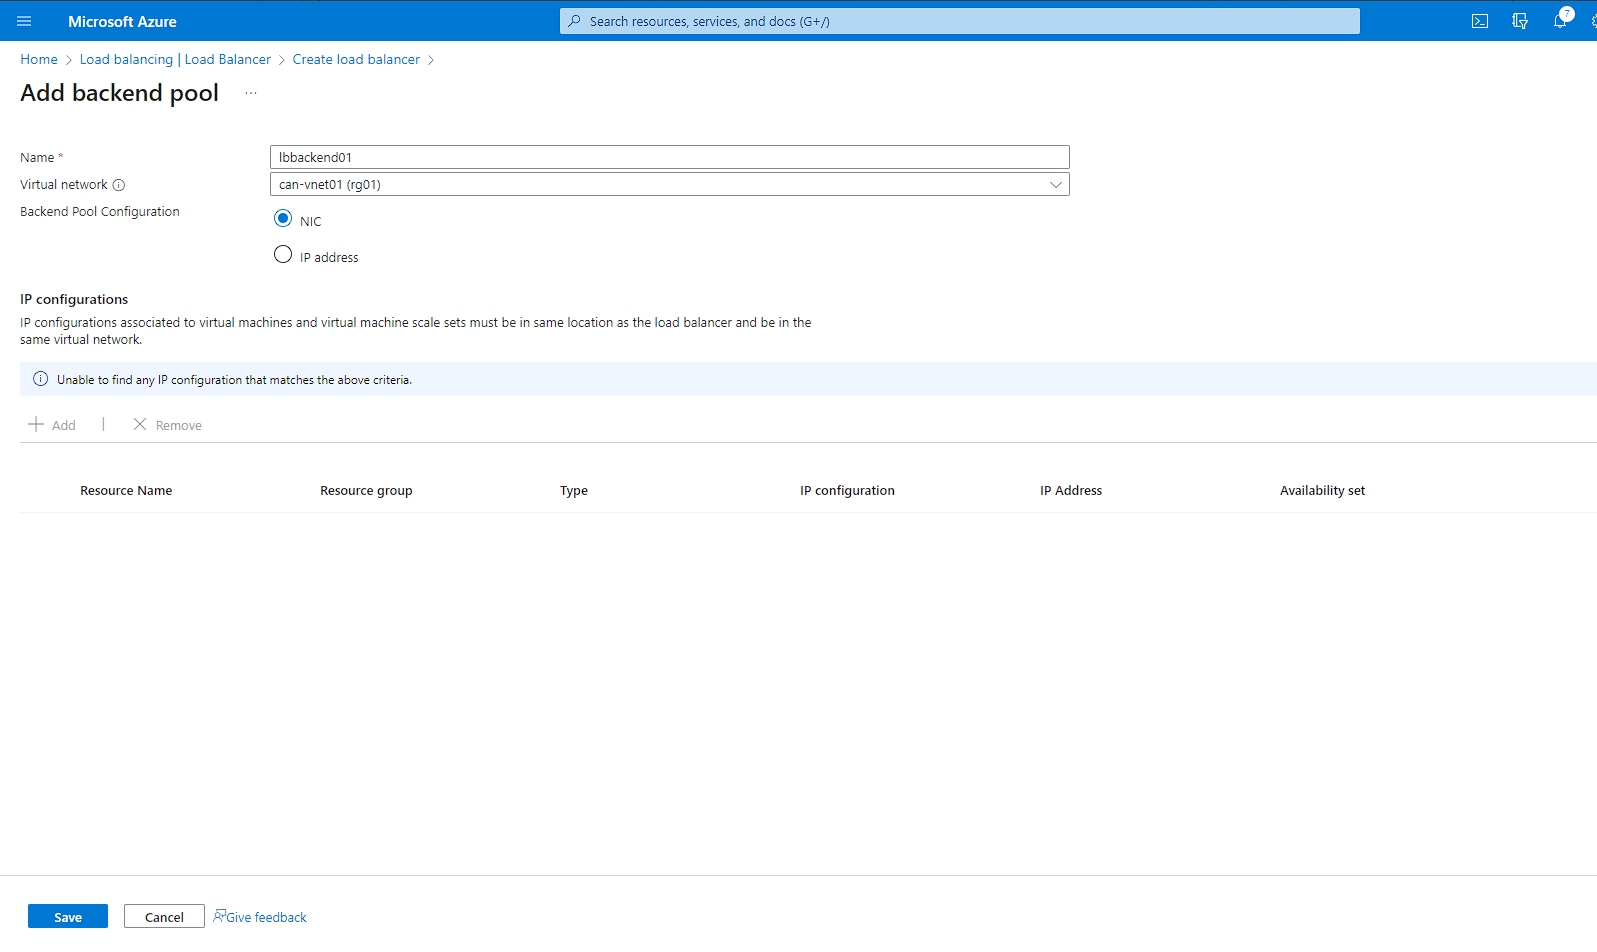
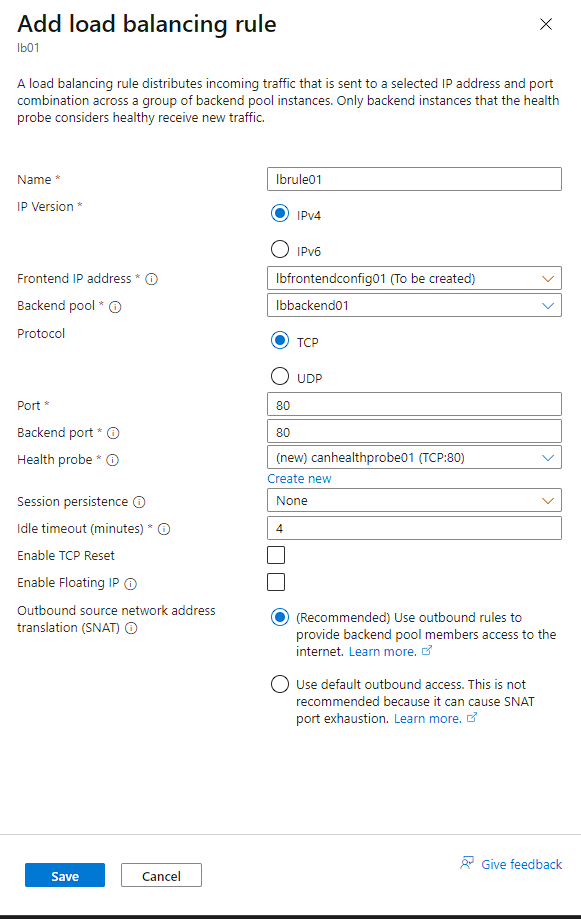
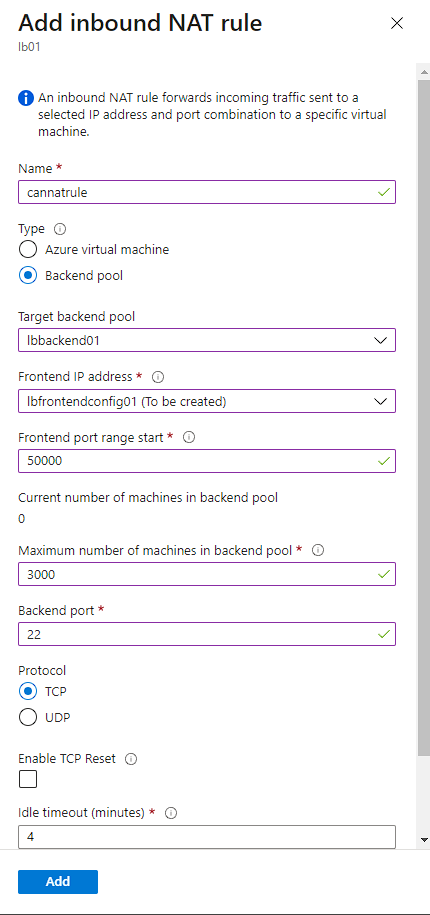
- Configure the front-end IP configuration, back-end pools, and health probes as needed.
- Click the "Review + create" button and then "Create" to create the load balancer.
Load Balancer


Step 5: Create a Virtual Machine Scale Set (VMSS)
- In the Azure Portal, search for "Virtual machine scale set" and select it.
- Click the "Create" button.
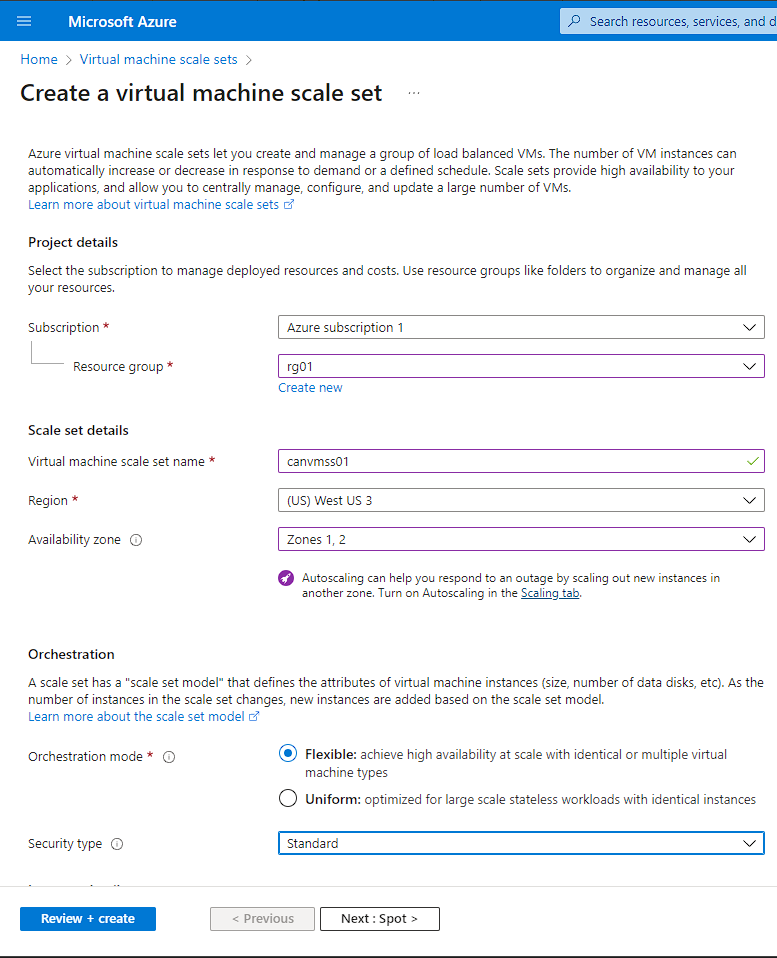
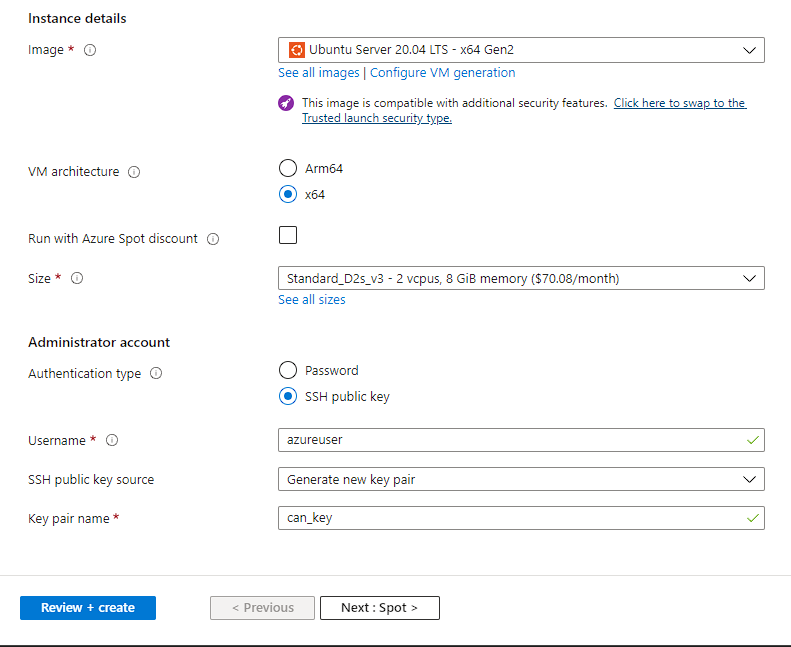
- Fill in the details for the VMSS:
- Basics:
- Subscription: Choose your Azure subscription.
- Resource group: Choose the resource group created in Step 1.
- Region: Select the same region as your resource group.
- Name: Enter a unique name for your VMSS.
- Image:
- Choose a base image for your virtual machines.
- Disks
- change the OS disk type to Standard SSD
- Networking:
- Virtual network: Select the VNet created in Step 3.
- Subnet: Choose a subnet within the VNet.
- Public IP address: Depending on your configuration, choose to have a public IP or not.
- Load balancer: Select the load balancer created in Step 4.
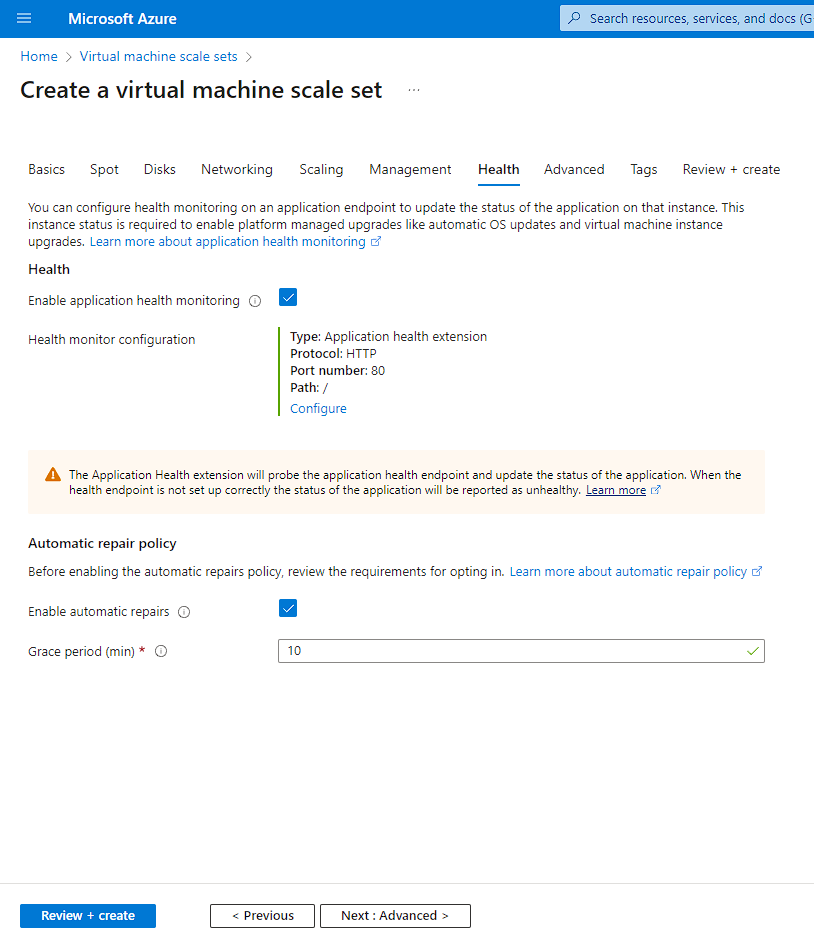
- Scaling:
- Configure the scaling options based on your requirements.
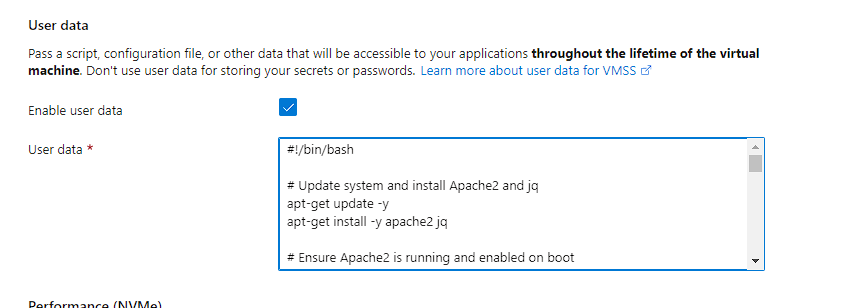
- Advanced:
- select Enable User Data and input the following command.
#!/bin/bash

# Update system and install Apache2 and jq
apt-get update -y
apt-get install -y apache2 jq

# Ensure Apache2 is running and enabled on boot
systemctl start apache2
systemctl enable apache2

# Fetch Azure VM metadata
METADATA=$(curl -H Metadata:true -s "http://169.254.169.254/metadata/instance?api-version=2021-01-01")

# Log metadata for debugging purposes
echo "$METADATA" > /tmp/metadata.json

# Extract data from the fetched metadata
local_ipv4=$(echo "$METADATA" | jq -r '.network.interface[0].ipv4.ipAddress[0].privateIpAddress')
az=$(echo "$METADATA" | jq -r '.compute.location')
vm_id=$(echo "$METADATA" | jq -r '.compute.vmId')

# Generate an HTML file with the extracted data
cat <<EOF > /var/www/html/index.html
<!doctype html>
<html lang="en" class="h-100">
<head>
<title>Details for Azure VM</title>
</head>
<body>
<div>
<h1>Azure Instance Details</h1>
<h1>Samurai Katana</h1>

<p><b>Instance Name:</b> $(hostname -f)</p>
<p><b>Instance Private IP Address:</b> ${local_ipv4}</p>
<p><b>Availability Zone:</b> ${az}</p>
<p><b>Virtual Machine ID:</b> ${vm_id}</p>
</div>
</body>
</html>
EOF

# Remove the temporary file
rm /tmp/metadata.json
VMSS


- Click the "Review + create" button and then "Create" to create the VMSS.
- copy the public IP address of the VMSS and add http:// to the beginning and paste it into a new tab. your new website should be live.
Congratulations! 🎉
You've successfully completed the lab!